‘Chasing Dreams’ with Sassyscrappers

Hello everyone! With the beginning of a new month I thought I would share with you all the projects I created for February with Sassyscrappers

I had the joy of working with the Chasing Dreams collection by Maggie Holmes.Swoon! Haven’t seen it yet?? Check it out here.

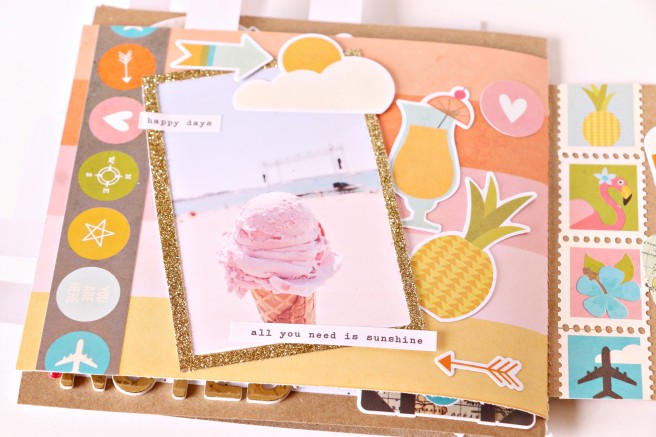
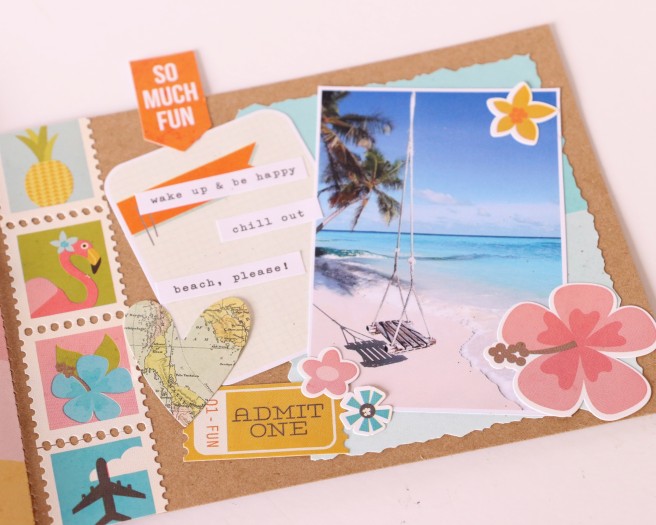
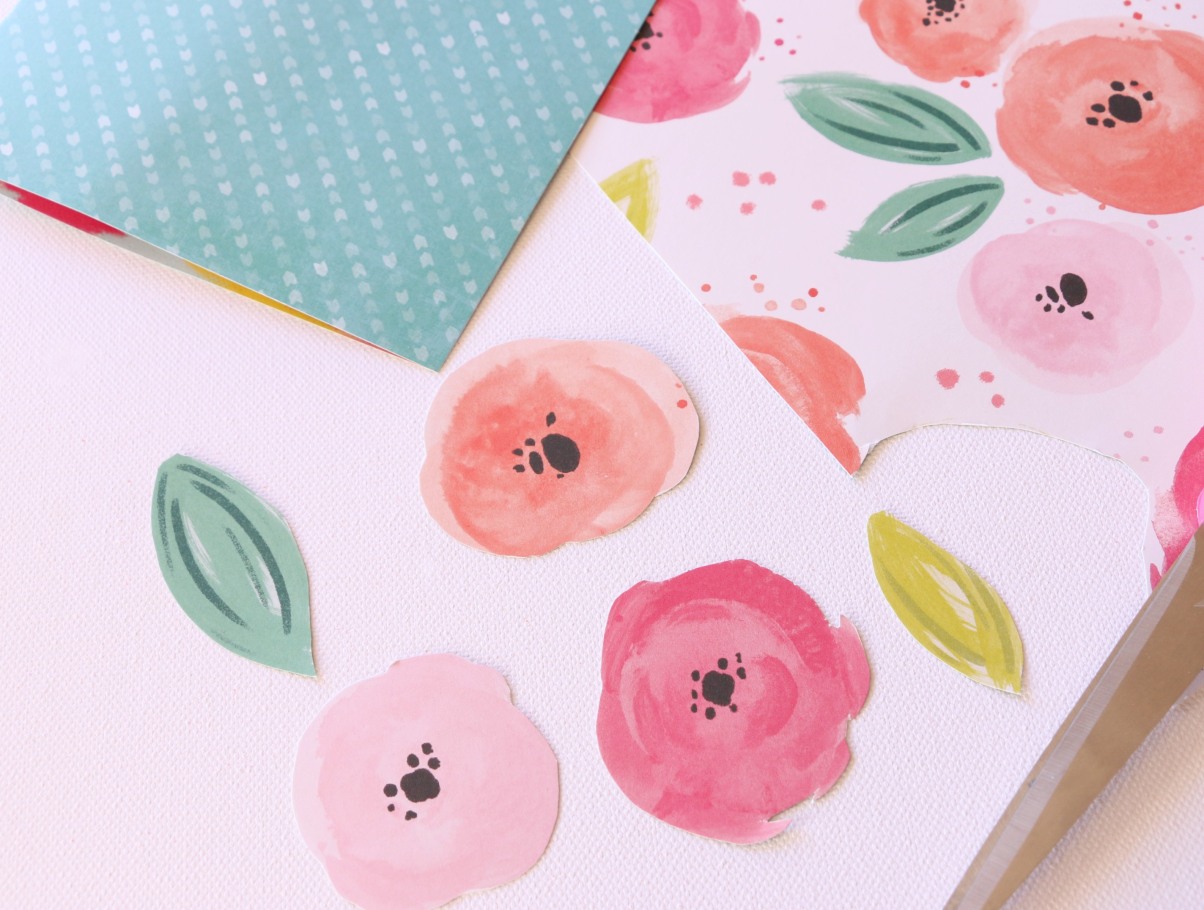
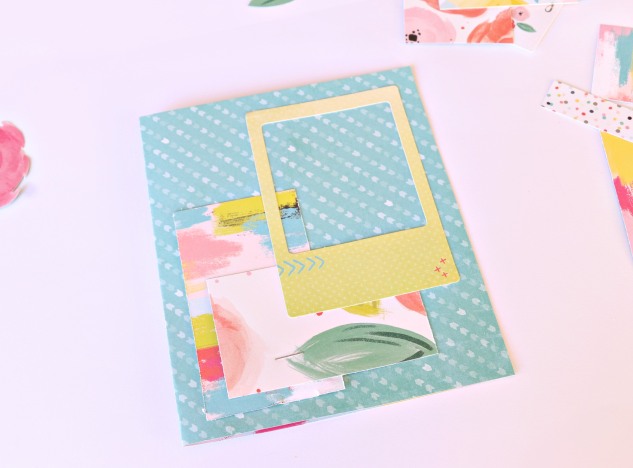
I really tried to mix it up this month and found myself creating lots of different projects.First of all was my pocket pages.I created page inserts using elements from the collection and using smaller sized photos over the top.

img_2772

I was super happy how these turned out.They had a really delicate vibe!

img_2775

img_2776

img_2777

Here is a closer look at the inserts I made-

img_2785

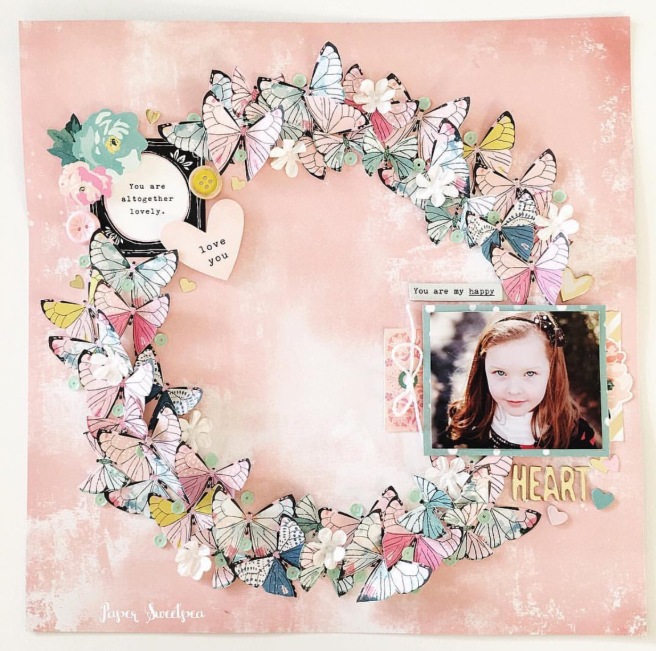
Next up was my Butterfly layout.If you follow my Instagram you will remember how I went on a fussy cutting adventure-

img_3386

I now have hands as strong as steel!

But once my layout came together I knew it was totally worth it.Those Butterflies are so pretty!

img_3387

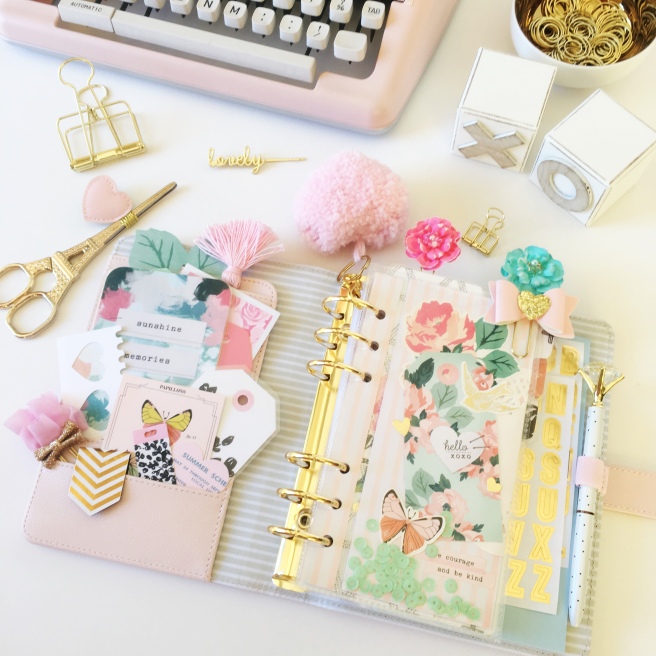
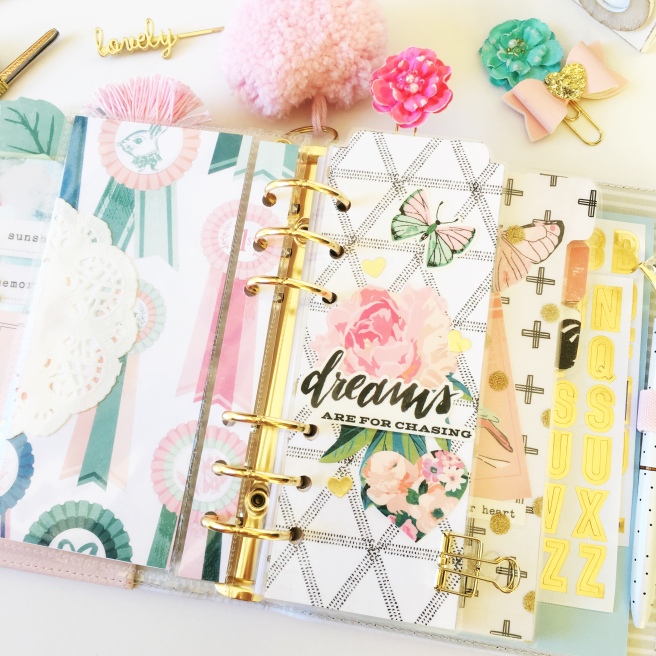
Next I thought I would give my planner a makeover….as you do.Theses papers and stickers etc are SO versatile and I knew they would look amazing in a planner set up.

img_3101

img_3102

img_3103

img_3105

img_3106

img_3107

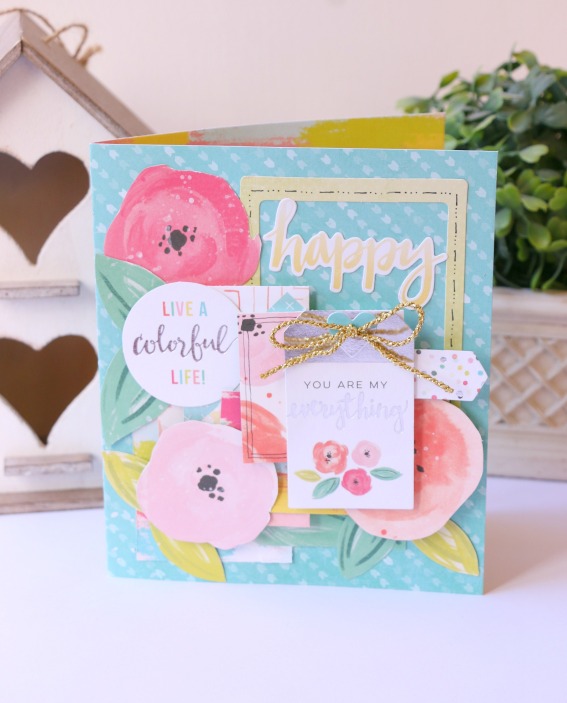
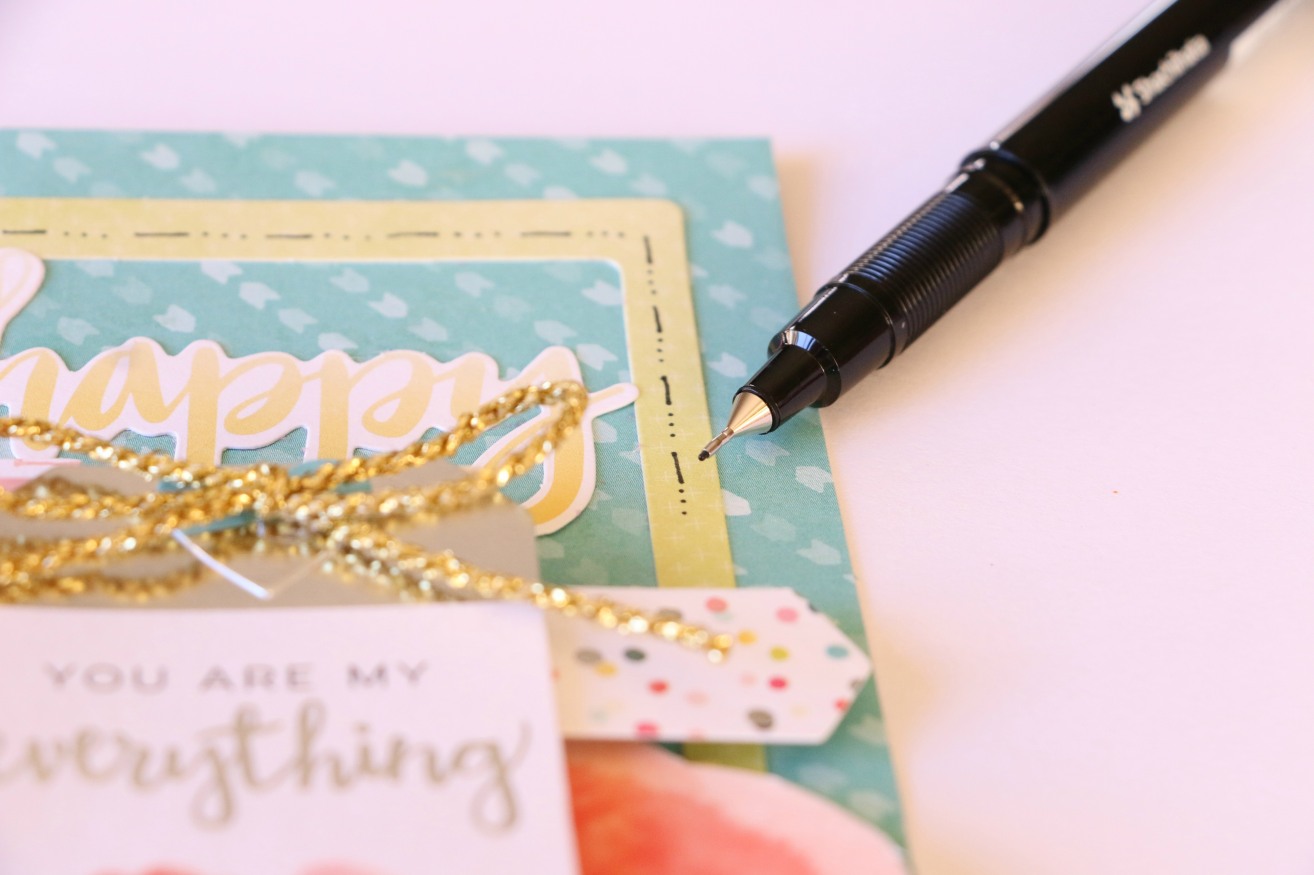
My final project for the month I decided to make some postcards.I kind of got the idea after I made the inserts for my pocket pages.For the back I used stamps from Kaisercraft, they gave a great effect.

img_3388

So that was what I’ve been up to.How about you?

I hope you enjoyed todays read,

Until next time,

Kylie xoxo

A Sassy September

Hello friends!

I’ve been so busy I haven’t updated for a little while.I hope you are all well.Today I thought I would show you the fun projects I have completed for September for the Sassyscrappers design team.I used a couple of different collections this month, so let’s take a little look~

img_0109

Sweet little snailmail booklet using ‘Take Me Away’ by Pink Paislee You can watch a process video here

img_0115

Altered journal using ‘Take Me Away’ by Pink Paislee (Flowers from my stash).

img_0114

Layout using ‘Take Me Away’ by Pink Paislee

Snailmail using ‘Gather’ by Maggie Holmes design.

img_0110

Snailmail pocket book using ‘Gather’ by Maggie Holmes designs.

So there you have it.I had quite a busy month and thoroughly enjoyed creating these projects.I hope they have inspired you to create your own.

Don’t forget you can find supplies at Sassyscrappers

Keep creating!

Kylie xo

‘Cute Girl’ Scrapbooking layout

Hello friends! It has been a while since I last updated my blog.I blinked and July somewhat disappeared.

Today I am sharing with you a project completed with the Sassyscrappers Design Team.I have completed a Scrapbooking layout using the new ‘Cute Girl’ collection by Crate paper

When I first saw this I died! No really……I truly LOVE everything about this gorgeous range and can’t wait to share more projects with you including some Snailmail.Here’s just a few pieces of the range-

Now was I right or was I right??Adorable! And this is only some of it.

Anyway, here is a look at my layout-

IMG_8802blog_opt

I love adding a touch of Shabby Chic in my themes and this collection lends itself perfectly for that.I don’t know why but corrugated cardboard is my latest big thing.I love the textures you can create with it.The flowers and bird cage chippy were from my stash but they went beautifully with the theme.I added a touch of pastel colour to the ‘My Girl’ wooden tag for a softer effect.

Here’s a closer look-IMG_8803blog 2_opt

IMG_8804blog3_opt

IMG_8805blog4_opt

IMG_8806blog5_opt

IMG_8807blog6_opt

So there you have it! Feel free to ask any questions and you can also catch my latest adventures via Instagram here

Keep creating and have a wonderful day!

Kylie xoxo

June-Sassyscrappers Designs Team.Project 4

Hello everyone! June is coming to a close and for my last design project with Sassyscrappers I am again using the ‘You are here’ collection by Simple Stories.This is a great collection to use if you are documenting your travels or holidays! I love the collection of papers,stickers etc.You can see them all here

This week I wanted to make a mini travel journal.I’ve never lied about how slack at journaling I am.I always start with great intentions and then never get round to finishing.This little booklet is a way of keeping a few special photos of your travels and making a few short journal notes as well.You could also keep receipts,tickets or anything else that was special about your trip, and because of its size you aren’t committed to journaling page after page.Here are some pics of the finished result-

IMG_0774.jpg

I wanted the finished book to look as though it was ‘busy’ and full of interesting things.I also wanted it to look uneven.You can see I have cut all my pages to different sizes.I start small at the front and gradually get larger.I have bound the pages together by using my sewing machine and stitching down the centre.You will see this soon.

IMG_0775.jpg


You can see here all the different sized papers and the tabs added around the edges, really help with the effect I was after.

IMG_0777.jpg

The first inside page on the left I wanted to have look like a postcard! I think the simplicity helped achieve that.The page on the right, I’ve left room for adding a holiday snap.The first introduction to your little book.

IMG_0778.jpg

You could line this page with a map of where you are staying but I thought the enamel marker dots and string was a fun addition for the theme.

IMG_0779.jpg

Next I included a paper tab for holding another photo and ticket on this page.You could also place receipts etc here.

IMG_0782.jpg

Next is the middle of the book.This photo gives a great view of how I stitched the book together.The inclusion of these next few pages are for journaling. I will be filling these in later.

IMG_0785.jpg

I allowed three pages for documenting, but if you are savvy at journal writing, you could add more pages to your book.

IMG_0009.JPG

IMG_0789.jpg

These last few pages I have dedicated to photos.The stickers and bits & pieces from this collection are so fun to highlight your project with.

IMG_0791.jpg

I hope you have enjoyed this weeks project.This would also be a fab, deluxe postcard to send to someone.The possibilities are endless!

IMG_0796.jpg

Thanks for reading! Have a fun week!

Kylie xo

Paper Sweetpea

June ~Sassyscrappers design team.Project 3

Hello again!

For this weeks project with the Sassyscrappers  design team I am working with one of my very fave brands Simple Stories and their new ‘Bloom & Grow’ collection.As it is Winter here in Australia (and a yucky one at that) I loved using all the cute little accents to remind me of Spring!Here are a few quick snaps of the outside of this little book.You will see that I have used some rings to bind the pages together.

garden1.jpg

IMG_0746.jpg

IMG_0741.jpg

For this design I used some plain brown cardstock as a base for my pages.I think it gave it a really nice rustic appeal.For those of you wanting to know measurements I cut each piece of brown card to 6″ x 6″ or 15cm x 15cm. Using the 6″ x 6″ paper pad from this collection, I cut 1cm or 10mm off each side prior to gluing to the brown cardstock.

IMG_0749.jpg

I have to say I love all the cute little bits and pieces in this range.How seriously cute is that wee Garden Gnome??

IMG_0726.jpg

When you first turn the page of the front cover, you will see I have added a little pocket.I plan to add some gift tags or stickers into this.I have also used zig zag stitching done on my sewing machine as little borders throughout the whole book, for the rustic appeal again.

IMG_0728.jpg

This next page I added a little space to put some seedlings to send.(And yes they are Sweetpeas of course!) I thought it added a nice touch considering the theme of the mail.

IMG_0729.jpg

NOTE: I’m not sure whether I would send seedlings internationally.I plan on sending this within Australia as I’m not sure if some countries,customs laws may frown upon this.But you could still use this tab for placing tags,photos,stickers….Anything you like.

IMG_0731.jpg

On the next two pages I have added some simple,yet generous sized pockets for placing your letter and other goodies into.

‘Lettuce Turnip the Beet’…..So cute and quirky!

IMG_0732.jpg

I hope you like my project for this week.To conclude it I tied some co-ordinating pieces of ribbon to the rings.I think it gave it a fun,country vibe!

IMG_0747.jpg

You can buy all your supplies for this project via the Sassyscrappers website

Here are a couple of other projects that have been on my creative desk recently too, I hope they give you some inspiration for your next project!

Keep creating!

Kylie xo

Paper Sweetpea

.P.S.- Don’t forget to check out my Etsy store here

June~ Sassyscrappers design team.Project 1

I can’t believe we are in June already.Whaaaatt??

This week as part of the Sassyscrappers design team I am using products from the Hello Sunshine collection by Cocoa Vanilla.I love the Summer themes and colours.

I had so many ideas for these goodies, and this was the finished result!

IMG_0709.jpg

Again I’ve been playing with layering cardstock,adding stitiching and spray mist for texture.I thought the faint application of the spray mist added the effect of clouds to the cover.

IMG_0693.jpg

Inside the front cover finds a cute pocket for putting your mail or cards in.I love the denim look paper in this range.

IMG_0694.jpg

To the right side here you will see I have added a little paper slot for putting gift tags in.I love making tags!You can personalise them any way you please!

IMG_0698

In the centre of the book features a fold up pocket or envelope.This is great for storing any goodies you like into and I think it adds an element of fun to your project!

IMG_0699

Since it was a Summer themed booklet I also added my own fun photograph!

IMG_0697.jpg

This was a lot of fun to make.I hope you will try also! You can follow my YouTube video tutorial here

Thanks for following along, don’t forget to tag me in your creations on Instagram paper_sweetpea

Keep creating!

Much love

Kylie xo


May 2016 ~ Hello Gorgeous

For the last week of May with the Sassyscrappers design team, I found myself creating with the ‘Hello Gorgeous’ collection by My Minds Eye again.

This time I decided to create a very simple, yet sweet flip book for sending mail in.IMG_0683.jpg

Lately I have loved adding layer upon layer, fussy cutting and using foam tape to raise and add interest to my projects.IMG_0679.jpg

From side on you can see the effect of this! I also added some gold,metallic string as a background feature.

Inside was again very simple…..

IMG_0686.jpg

The pocket on the inside cover would be ideal for storing your letter or cards in.Whilst the right side lifts up to reveal a cute little pocket….IMG_0674.jpg

I add some detail stitching (very carefully) with my sewing machine.IMG_0689

I love that less is often more with details.This wasn’t an overly embellished little booklet but I still think it would be lovely to receive.IMG_0685.jpg

Thanks for reading today.I’m excited for what projects are created in June!

Keep creating!

Kylie ( Paper Sweetpea )

Products Used:

Hello Gorgeous by My Minds Eye.

Available at Sassyscrappers


May 2016 ~ Fancy Free Card

This week as part of the Sassyscrappers design team I made a very sweet layered card using the Fancy Free collection by Pink Paislee

Such a pretty range of papers,stickers and die cuts!For this project I used the following-

Before I show you how I made it, here is the finished result!card 1IMG_0628.jpg

The first thing I did was fold a 12 x 12 sheet of paper in half and cut to the desired size.Then I took to fussy cutting some flowers and leaves.I really loved these blooms!IMG_0613.jpg

Next I cut varying designs of paper into random sized squares and rectangles ,making sure they weren’t too large!IMG_0614.png

I then began the process of gradually layering these pieces together for the front of the card.I did this in sections, and gradually with each few layers added, I started raising them by using foam tape.IMG_0617IMG_0618

Eventually once I was happy with the effect it looked like this.IMG_0619.jpg

You can see by raising the layers of paper with foam tape, it gives the effect of dimension.Then I started to position the flowers, leaves and other diecuts in and around the layers of paper stacked.Some of these pieces I also used foam tape to raise them off the base as well.You can really see it taking shape now!IMG_0620.jpg

I really like the little details sometimes and find it is what really finishes your project.I added a sweet gold bow and tag………IMG_0622.jpg

Some detailed border lines with a fine tip marker…..IMG_0623.jpg

And some flicks of white mist paint………and YES! I got it everywhere but where I wanted it the first few goes…..You are not alone friends.IMG_0625

I loved this project as it is a great way for using up some of your little off cuts of paper.If you are like me you have PLENTY of those stored away!IMG_0629

I hope you enjoyed my little project today!

Keep crafting!

Much love,

Kylie xo ( Paper Sweetpea )